Saturday, October 31, 2015

Tim Holtz 12 Tags of 2015, October

======
============
==============
=================
=====================

HAPPY HALLOWEEN!!!!!!!!!!!!!!!!!  

The spooky goblins are out and about as we speak!!  

Crissy Cross, my little skull and crossbones is right at home because he LOVES everyone and everything.  Nothing scares him in the least.  He is happily out playing tonight with his friends - Mr. Pumpkin, Madame Skeleton, the Sneaky Snake family and Cattywompas! The best thing about the play time is that Crissy Cross can fly so he hovers over all his friends and eavesdrops on the other flying creatures! Wheeeeeeeeeeeee!


I used the following die:
Cutterbug: Beware
Tim Holtz Alterations: Heart Wings


Night night....
And hugs... from Joi and Crissy Crossy :)

~ ~ ~ ~ ~ ~ ~ ~
This is for:


================================
========================
=================
============
========

There Is Always Something to be THANKFUL for!

======
===========
=================
========================
==============================

As we enter into the month of "thanksgiving" thoughts of thankfulness abound. 

My daughter will tell you that EVERY DAY... 
I am always pointing out...
THERE IS ALWAYS SOMETHING TO BE THANKFUL FOR
(sometimes it drives her nuts!!!).  

I loved doing this project. 

I love, love, love bright jewel tone colors and sparkle. 
My favorite color is orange... thus I love fall and leaves.

And I totally love this photo.  Why?
When I see this photo - my heart sees mankind... look up towards a heavenly Father.  Loving, trusting, and believing that He has a plan for each of us.  He promised peace, strength and hope for each day and I thankfully claim that promise!

I am grateful each day for the small things and when big things happen, I am astounded and amazed!  I walk through life looking through the eyes of a childlike faith because I trust God's plan. 
Here is my "THANKFUL" creation. 


I began with a 12x12 piece of Craft n Craftin' dark royal blue glitter cardstock.  In the end... I used a silver glitter cardstock!! 

I began piling my jewel tone colors on the cardstock using: 
DecoArt Metallic Lustre Radiant Red & Black Shimmer
and 
ColourArte Silks Acrylic Glaze: sapphire on ice, spiced pumpkin, persimmon, mango mamba, sky blue, autumn skies, key lime, rusty mauve, pink anthurium, snap dragon, autumn leaf, golden monarch, azurite, wine and rose. 


After I had layers of paint added I topped it off with DecoArt Media Liquid Glass.  I wanted a stained glass window look!

I then covered all the paint with a grocery sack and let set a while. 


When I removed the paper... there was so much left on the sack that I grabbed a silver glitter paper and repeated the process. 


Afterwards I tried my photo on both backgrounds the silver worked best. The blue in the picture is almost a purple and didn't go as well with the blue glitter. 


It's so much prettier than it looks here! The DecoArt liquid glass made it glisten even more!


I used Galeria Glass Beads Texture Gel for the leaves.
Stencil: The Crafter's Workshop, Ferns by Jaime. 


I painted the leaves with the same paints: Metallic Lustre & Silks. 
They are outlined with: Faber-Castell Big Brush Pen: Cobalt Blue.


The wooden letters were also painted with Silks and Metallic Lustre. Matching the "blue" in the picture took several colors!

DecoArt Metallic Lustre: Black Shimmer
ColourArte Silks: Sapphire on Ice, Periwinkle.


The colorful strips are from my stash left over from Easter eggs!


I added some fabric flower trim and a broken brooch to the photo. 


Around one side of the photo is lace that I gather by hand!


I covered some cardboard in the same lace to use under the colorful Prima flowers. 


And guess what else... I am thankful for ALL OF YOU. 
Each one of you reading this post - right now - is a blessing to me.
Have a wonderful and thankful November!
Hugs. j. 

~ ~ ~ ~ ~ ~ ~ ~ ~ ~ 

I am "thankful" to enter this project in these challenges:


----------------------------------


===========================================
=============================
=======================
================
=========

Wednesday, October 28, 2015

31st Annual Boogaloo Ball Mixed Media HORROR

==========
===============
===================
======================
=========================

Hello again sweet crafting friends! 

Oh dear.... just a minute... someone is knocking on my door.
Be right back.....

OOPS...  they stopped here by mistake.
They were looking for the Boogaloo Ball... next door. 
Now I'm curious... gotta go check it out. 

Wow - what a freak night they are having... 
here, I snapped a picture for you.  

I can probably get us an invite.... wanna go??? 


Heheheh!!  This was a fun project.  Last year, I watched a Halloween video tutorial by Rach0113 and I made my grandchildren a similar mixed media project.  The lady that works for me fell in love with it so this year - I made one for her.  

I was thinking of it just as a gift so I didn't take many pictures. 
But it turned out to be so fun that I wanted to share.  

It is a 14 x14 canvas. 

I found the door online and marked it's place on the canvas.


Then I totally tissue paper everywhere on the canvas top and edges EXCEPT where the door would be placed.  I used DecoArt Americana Decou-page. 

Afterwards I used Deco-Art Media white gesso on the entire top and edges. 

After drying over night,  I began playing with colors.  I had the most fun using the Deco-Art Metallic Lustres on this piece. 
Gold Rush
Copper Kettle
Iced Expresso
Black Shimmer
Rose Gold

As well as:
Deco-Art Media Fluid Acrylics
Colbalt Turquoise 
Viridian

After painting, it was time to place the door. It was just printed on copy paper and placed onto the canvas with DecoArt Decou-page.
In fact, that is true for the pumpkins, the gate on the fence, the skeleton and the bats!

Oh and I created the Boogaloo Ball sign myself!! 


Then the fun began... layer and creating!

I used the umbrella man...
painting him with DecoArt Media black gesso. 
Sizzix Alterations Umbrella Man Die...
and turned the umbrella upside down. 


Using Ranger Distress Paint Picket Fence I added a bit of wear and tear to his jacket, britches and umbrella.

His skeleton head and hands are just printed from the internet and sized smaller to fit his body!


From this point on - it was just layering the items. 

The fence, the gate, the raven, the big spider, the cat and bats were all painted with DecoArt black gesso mixed with crackle paste. 

Sizzix Movers and Shapers Die - Mini Cat & Raven Set

My spider is also a Sizzix Die - Mini Spider &31.  


I used an old doily - painted it black - for the spider web at the top left of the canvas.  Something of my Grammie's that was worn out but made use of again!! I have dozens of nice ones too!!


I used lots of cheese cloth to make the white spider webs - that was REALLY fun!!!  And I had some small silver charms to add lots of spiders in the top of the umbrella and climbing the webs! 

The die cut spider, the raven and the cat are coated with DecoArt Media Liquid Glass - clear - adding just the right eerie appeal!!!


The raven is sitting on a small branch from the ranch, of course!


Can you guess what my favorite part of the entire piece?
The praying skeleton - isn't he cute? 
And yes, if we decide to go to this party - we should pray first!


Last, but not least, the dancing couple! 


The Boogaloo Ball is in full swing! 
Hope you enjoyed the little creation exploration. 

My wish for you... take time for a bit of Boogaloo!!!

Hugs. j.


~ ~ ~ ~ ~ ~ ~ ~ ~ ~ ~ ~
Happily sharing with the following challenges:


------------------


This project is highlighting the 31st Annual Boogaloo Ball. 
Thus the use of #31!
--------------


-----------------

==============================
=========================
==================
===============
=========

Everything's Coming Up Roses... OR IS IT???? Acrylic on Canvas

=========
================
======================
=============================
======================================

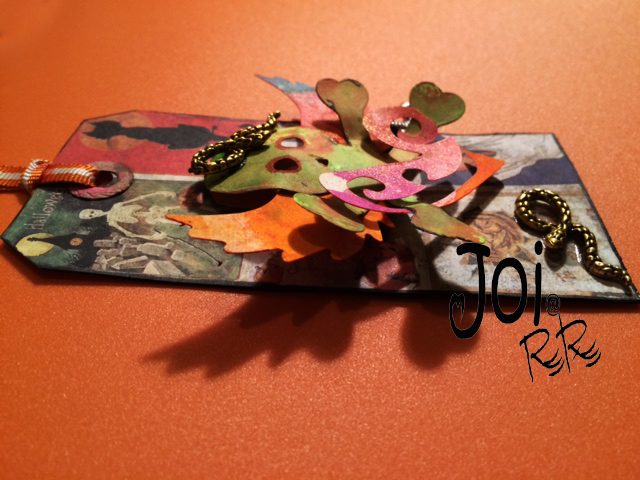
Joi here... from the RR Ranch in Texas saying:
HOWDY to YOU, my creative friends! 

Yes... it's a fact... All Saints Day/Day of the Dead
 is just around the corner so..... 
HAPPY HALLOWEEN  to all!!!!  

Here at the ranch... we still have lots of lovely roses blooming. 
But trust me, our rose beds do not hauntingly producing HORROR... until last night.... and then.....

what sounded like hundreds of coyotes eerily howled and whined...

a Mama cow began to bellow and a new baby calf screamed...

only to be silenced mid breath as the coyotes conquered...

and the black birds flew in mass overhead in the full moonlight...

the ground rumbled, turning red as the temperature rose...

and the Day of the Dead.... began... as the clock struck midnight.

Everything's Coming Up Roses.... right????


Mixed media it is - seems like this 20x24 canvas has it all! 
So much texture, glitter and crackles that the photos just do not capture the spooky depth and eerie glamour of the painting.


Having never done this type of ghoulish artwork before, I began knowing this was a big step out of the box for me! As you can see by the photos of the process - the resurrection of this gal was intense!  She just couldn't get her face on!!!!!!!!!!!!!  

I cannot believe it but I didn't get a picture of the canvas with the first coat of paint on it except in this shot. It looks small in this picture but it is actually 20" x 24".  It was so fun to just play with the paints - swirling and creating wild haunting colors!


I used layers of the following DecoArt acrylic paints.

The background also has:
Kaisercraft Clear Stamp Triangles Stamp
Plus various other items were used such as a sea sponge etc!

After the background was dry, I hand drew my skull by looking at a picture of a skull that I found online.  It was turned sideways and throughout the process I wished I had drawn one that was totally a front view. It seemed harder to get the lines right on the face. 


The teeth took me forever to get aligned and I decided I just didn't like her without hair so I totally went wild on the hair!!!  First using paint, then adding: DecoArt Metallic Lustre Paints.

With some Ranger Stickles on top of the paint and lustre. 


And then I just began painting!  After I had the skull in it just seemed right to draw the hand... no idea why - just did it!!


Then it dawned on me that she could have a Raven with her! 
Since I didn't remember to get a picture of the skull when I drew it - errrrrrr... 
I made sure to get one of the raven - hope you can see him here! 


Seemed like I wanted her to be a sugar skull type person so... I began adding texture. 

DecoArt Modeling Paste
DecoArt Crackle Paste
 Plus... an old stencil that has no markings.


At first, the stencil just went around the eyes... but bit by bit more was added - still going for the sugar skull appearance. 


I used crackle paint on the teeth!!! 


After stenciling around the eyes with the DecoArt Modeling Paste I began to paint the design with DecoArt Metallic Lustre Rose Gold.

Continuing to add more Modeling Paste and accent with Metallic Lustre in the following pictures!


I also added crackle paste on her arm, her hand, her eyes, her nose, her chin and her forehead. 


I love intuitive painting so it was easy for me to spot the "faces" in the paint on the lower left.  It just seemed natural to add the lines around the faces and making a cemetery!!! 

But all along - working and playing and sometimes thinking I should give up because I really WAS creating a monster.... came the idea of adding the black roses. This time I used:

 Galeria Glass Bead Gel mixed with black paint
The Crafter's Workshop Balzer Designs Mini Echoes stencil


 All the extra birds were added near the end. The sky seemed so blank so I added three little birds. 
Rubber Dance Stamps - For the Birds Set 
Then I added two more for a total of five.  
And then I thought... well... Alfred Hitchcock you were right...
lets just have the horror of the invasion of 'THE BIRDS'!!!! 

I drew the crown on the Raven's head towards the end too. A group I am in called 'A Pleasant Escape' for artists - had a Queen Art Prompt... so why not make my raven royalty???!!!!! 

The raven also had texture - some modeling paste as well as some glass bead gel.  The beak is just the background color!!!  The crown is bronze stickles and black paint.

Oh and let's NOT forget the ring bling on her finger!!  Must be at least a 31 carat diamond with the number 31 embedded inside. Afterall - a lady should always remember the date of her hauntings!! 


And LOOK... more ghostly faces.  After finishing the roses... I scraped some of the remaining texture/paint with a credit card over the top of the green paint - just for fun.  After it dried - there they were... ghoulish ghostly faces; seems as if they were the object of the hauntings!


Other items used in this mixed media process were:

Faber-Castell Big Brush and Pitt Pens

DecoArt Magic Brush and Stencil Cleaner (love this)

DecoArt Opaque Metallic Paint Markers

DecoArt Media Liquid Glass Clear (face and roses)

THANKS BUNCHES 
for sharing my creepy ghoulish HORROR adventure. 
Big Hugs coming your way.... Joi@RR


 ~ ~ ~ ~ ~ ~ ~ ~ ~ ~
===================
So excited to enter these SPOOKY challenges!


Our Creative Corner
Halloween Horror Challenge
-------------------------------------

Anything But Cute
Challenge 6 - 31 Days of Halloween

The #31 is on her ring!

------------------------------------------------
Mixed Media Monthly
Challenge 17 - Spooky Word Search!

So fun! I used the following words:
Skull
Bones - you can see her spine!
Purple
Orange
Black
Ghost - the heads at the top of the skull!! 
----------------------------------------------------

Lost Coast Portal To Creativity
Day of the Dead Contest


=================================
=======================
================
===========
=========