Thursday, December 21, 2017

BEJEWELED TREE - Merry Christmas Sweet Friends!


MERRY CHRISTMAS!!!


Just sharing my jeweled trees created from old jewelry.
These are not just for Christmas. I make them 
for housewarming, weddings, memorials...
a unique gift for any occasion!
Wanna know how????!!!!

This project was design for the upcoming Jan/Feb issue of:

It's so inexpensive to subscribe and it is a 
really thick and fab online magazine. 
Click HERE for details. 

And please remember to enter your artwork on the challenge blog too. There are always prizes and badges given!

ENTER your project HERE:
ANYTHING GOES!!!!

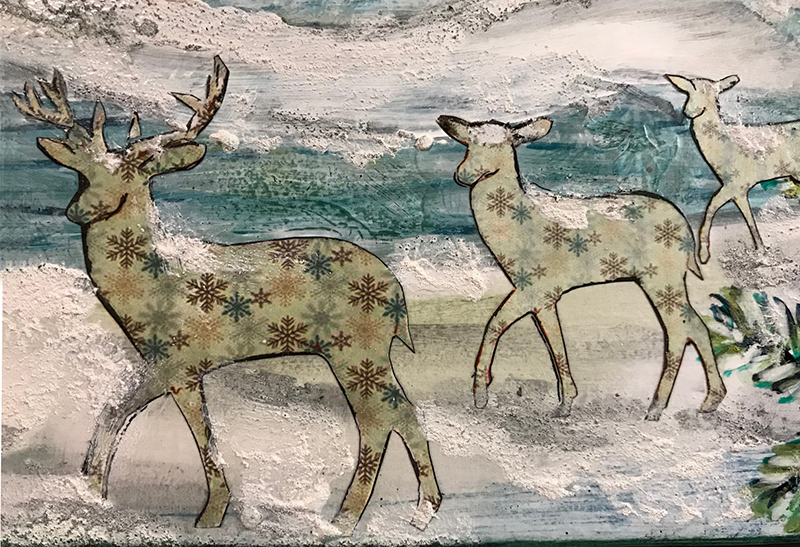
One more sneak peak...
hope you look me up in the Jan/Feb magazine!!! 


~ ~ ~
Believing for all of my dear artsy friends
- that's YOU - 
 to have a blessed Christmas!  Xj.

==================================
========================
===================
=============
=======

Tuesday, December 19, 2017

DEER HAVEN at SUNSET Painting: Designer Post TTCRD Magazine

Hello from Joi@RR!

We have lots of deer at the ranch and they are 
so lovely to sit and watch at sunset.


This project was done on a 12 x 12 wood panel.

Step by Step Instructions 

This is just a plain piece of plywood. 


With Matte Medium, apply your background papers.
This beautiful paper came from a set called:
The Nature of Christmas by Decosse's Dynamite Doodles.


When your paper is completely dry, cover with
a satin varnish to protect it as you paint.


Begin painting. This shows the numerous colors
used to complete the sunset in this painting.


I decided to snuggle up the little cabin under the
gorgeous trees. I sketched it in and began painting.

I used Prussian Blue Hue as the first layer 
of the evergreens too. In the end, they had
about 5 layers of paint and a layer of snow!


I fussy cut the deer from another lovely piece of 
Decosse's Dynamite Doodles paper from the
Nature of Christmas Set. They were applied
with DecoArt Media Matte Medium. 


What fun it was to add DecoArt Snow Writer
to this project. It gives such great dimension!


Here are a few close-ups!


After all was completed, the project was varnished
with DecoArt Media Gloss Varnish. 

Products Used: 
Lots of DecoArt Media products!
Dynasty Brushes.


The lovely paper that I used is from: 

Lisa offers digital prints, digital sentiments,
scrapbook kits, embellishments and she will
design a blog badge for your group too.


This project is inspiration for the Dec. 19
challenge at Through the Craft Room Door Challenge

ENTER your project HERE:
ANYTHING GOES!!!!

Would love to see you there...
from cards to mixed media  - all projects welcome!

Challenge Prize: 
Holiday Hoopla, or your choice of 30 digital
papers from the winter or Christmas section. 

From our sponsor: Decosse's Dynamite Doodles.


~ ~ ~
Wishing you a lovely sunset evening and
perhaps even a deer or two along the way!  Xj.

==================================
========================
===================
=============
=======

Tuesday, December 12, 2017

DecoArt Media DT Post: Halls of Time 36x72 Canvas

HOWDY sweet friends!

 I have a painting up on the DecoArt Media Blog today!!
It is a 36" by 64" wrapped canvas done with 
Fluid Acrylics and Mediums. 

Here is a sneak peak - just a tiny bit - of the canvas.


The painting is entitled "Halls of Time". 
Sometimes in life we have tough choices to
make, just as each generation before us.
The decisions are important which could cause
us to feel overwhelmed and insignificantly small.
This creation was painted to portray that feeling. 
Others are around us, but the hallway we choose,
the directions that we take - is ours alone. 

You can view my step by step process
instructions for this painting HERE:

Or go to this link: 
http://decoart.com/mixedmediablog


Wishing everyone at DecoArt Inc. and all my
artsy friends a blessed Christmas season. 
It's a great gift for me to have this
wonderful opportunity to share my 
art on the DecoArt Media blog.

Here is another sneak peak...


  I would also really appreciate you leaving a comment on the DecoArt Media blog page.

Thanks bunches for visiting me today
and sharing my adventures!! 
Joi@RR


------------------------------------------------------------
------------------------------------------------
--------------------------------------
-------------------------
------------

Wednesday, December 6, 2017

CHESTNUTS ROASTING Shadowbox,Southern Ridge Trading & DecoArt Media


Chestnuts Roasting
Christmas Trees Shimmer
Music Plays
Memories Abound
Cozy Christmas Greetings to you all! 

This is a 14x14 shadow box scene.

Happy mail brought me some lovely chipboard
and I was in the mood for a fun Christmas project.  

I began by painting the chipboard. 
Just look at the detail in these pieces from:

I included their link because when you visit - it's 
better than a candy store for creative folks like us!!! 


Covering each piece with white gesso. 


Great little shadow box that hubby made for me!


These are the backing pieces for the trees. 
However, the red one changed to gold along the way.
The white chipboard was painted with
DecoArt Glamour Dust - love that sparkle!


The paper is from "My Mind's Eye and "On Trend".
It was cut and added to the back of the shadowbox.


Time to paint the foliage for the mantle!


And start the memories rolling in carbon black. 


The fireplace was completely covered with:
Texture Sand Paste. I just love that stuff!


And the rug was made from a napkin - 
hehehehe or should I say hohoho!!


Here is a glimpse of the finished 'background'.


Somehow I got carried away with "Decking the Halls"
and forgot to share pictures with you!
By the way... that is the title of the sheet music on the piano.
I actually made it read
Deck the Halls with the words too!!  
Here is a close up of the finished trees. They were
decorated from old jewelry from my stash.


Here is a glimpse of the scene before the couple arrived.


And a few close-ups of the final piece.  

Some things are paper like the clock
 and some things I painted free hand. 


The paper around the edges of the shadow box
are much prettier in person.  I love all the positive
sentiments and of course, the shimmer of the gold print.


PRODUCTS USED:
DecoArt and DecoArt Media'
Southern Ridge Trading Chipboard
Faber-Castell Artist Pitt Pens
Dynasty Brushes


So... away from my canvas paintings for a bit of fun!

Thanks bunches for stopping by...
And - to each of you - as it says below
EVERYDAY, YOU ARE FABULOUS!
MERRY CHRISTMAS. Xj.

================================
=============================
=======================
===============
========

Tuesday, December 5, 2017

Season's Greetings BUDDY! TTCRD Magazine Design

Hello from Joi@RR!

Tis the season for...
wintery berries,
a bit of snow,
warm boots,
and
a walkin' buddy!!


This project was done on a 8 x 10 baltic birch wood panel: Savannah by Walnut Hollow.

Step by Step Instructions 

I began by covering the edges of the board with masking 
tape to make a defined boarder line when removed. 


The board was then covered with black gesso. Why?
I have found that when working with "snow" 
type paintings - the black underneath gives
a special depth and shadow to the finished piece.


After the black gesso is dry... begin adding
Shimmer Mister colors. The Misters leave such
amazing designs in the paint. Part of me wishes
I would have just left the trees undefined
as they looked below. Incredible shimmer too!


Randomly add the DecoArt Snow Writer to the trees. 
This is sooooooooooooo much fun.  
I use Snow Writer year round. It adds such great
dimension to any project.


After the image was totally dry,
pull off the masking tape and see your
perfectly formed edge!!!

 Add you digi image with
DecoArt Media Matt Medium.  

If you have texture sand paste, it will add 
lovely dimension to the fur on the boys coat.
I also used it to give texture to the chip board fence. 


Here is a glance at the project about half way done!


Time to paint the child's outfit and his buddy too! 
It was hard for me not to paint the dog artistically. 
I began adding his coat with my liner brush 
but then realized all that "lined hair" would
not end up looking like the digi image portrayed!! 
I got him looking close to his image but not perfect.


The scalloped edge was painted white.
Shimmering silver rick rack was added too.


And then... it was done!

A bit of dimension.


A bit of texture.


And a wish...
"Seasons Greetings Buddy"!


After all was completed, the project was varnished
with DecoArt Media Gloss Varnish. 

Products Used: 
Lots of DecoArt Media products!
Dynasty Brushes.
Faber-Castell Artist Pitt Pens.


The boy and dog image "Mika and Shila" is from: 

Sheepski Designs originates in the UK and
offers great digital prints.
I ADORE the Santa she just added...
click HERE to see him!


This project is inspiration for the Dec. 5
challenge at Through the Craft Room Door Challenge

ENTER your project HERE:
ANYTHING GOES!!!!

Would love to see you there...
from cards to mixed media  - all projects welcome!

Prize: 3 digital images
 from our sponsor Sheepski Designs.


~ ~ ~
Would you believe that I don't even own a coat?
It just doesn't get that cold in this part of Texas. 
Raised in Missouri though, I enjoyed lots of
long walks in the snow!!!  Xj.

==================================
========================
===================
=============
=======